Have you seen those gorgeous maps on the wedding invites of your friends and family? Did you get a quote on what it’d cost to have one designed and just can’t afford it? Why not make one yourself! That’s what I did back when I got married and I loved the way it turned out.
This tutorial from My Rock, Paper, Scissors is not only simple to use but it’s exactly what I did in 2007 when I designed my own map. In 10 easy steps you will have designed a map that’s perfect for any occasion.
DIY Wedding Maps Tutorial
1. Google Map the area around your event site(s).
2. Determine the scale and the level of details you want to include in your map. In my case, the wedding couple only wanted to show the ceremony and reception sites. So I zoomed close enough in the map to include just these 2 locations.
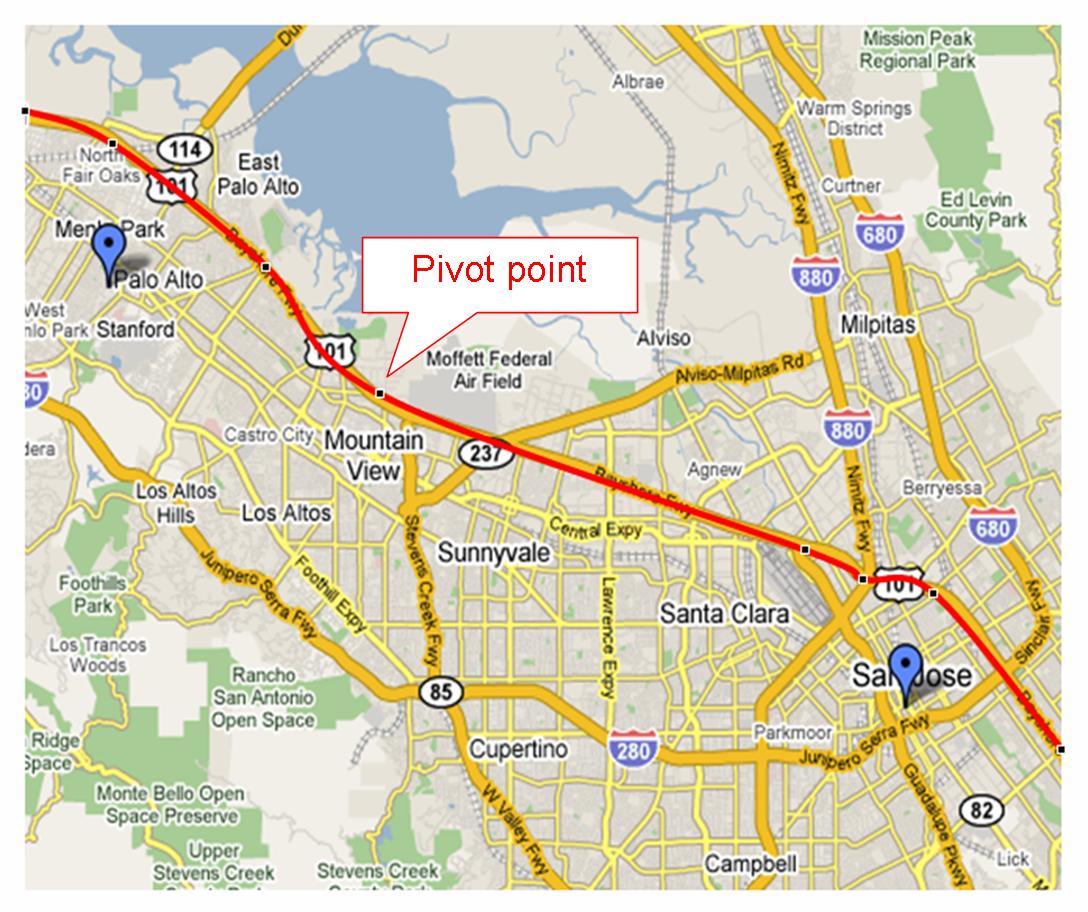
3. Once you are at the right scale, do a print screen. (There should be a PrtScn or PrtSc button on your keyboard. If you only want to capture the window with the map, but not the junk on your deskstop, click on the map to make it the current active window, then press Alt-PrtScn.)
4. Open up a blank presentation in Microsoft PowerPoint.
5. Paste (Ctrl-v) the screen capture on the blank presentation.
6. Crop and size the image to approximately how you want the final product to look. Don’t worry if some of the scaling is off. No one has to know.
7. You should now have an idea of how detailed you want the map to be. For a wedding map, you probably just want to highlight the major highways or main streets, plus a few finer details (e.g. parking) around the wedding sites.
There are 2 ways to add highways and main streets:
- If they’re straight, use a Line;
- If they’re curvy, use Autoshape –> Lines –> Curve. To create curves that follow the turns on the roads, try click on the vertex on each turn. This will create a series of pivot points (Fig. 1) that will help curve the line as you trace the rest of the road. Double click to end the tracing.
8. After the highways/main streets are done, you can start to add more details (eg. street names, ceremony and reception location, etc.). If you have out of town guests, consider adding one or two landmarks close-by to help them navigate. But don’t clutter the map with information irrelevant to the occasion. They will distract guests from finding their way to your event (Fig. 2).
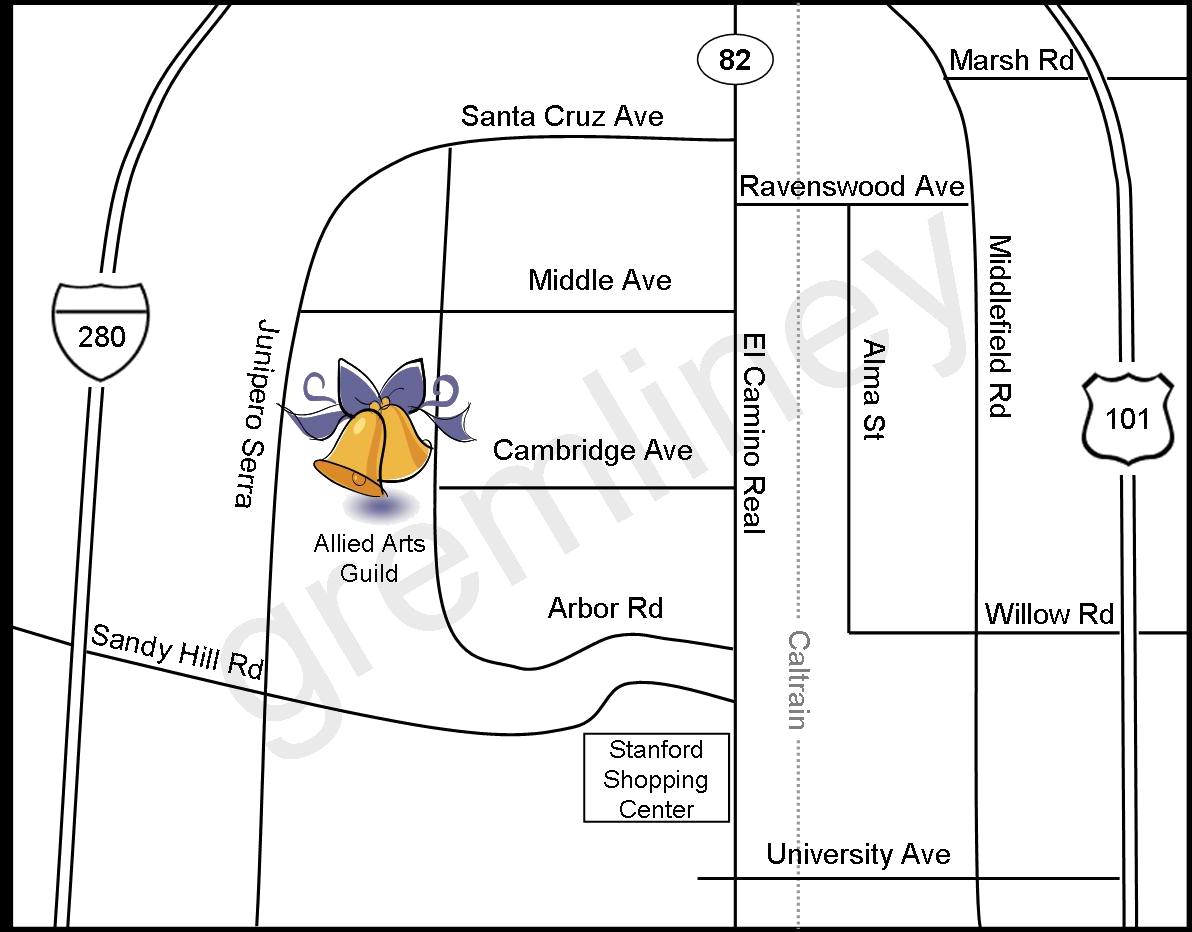
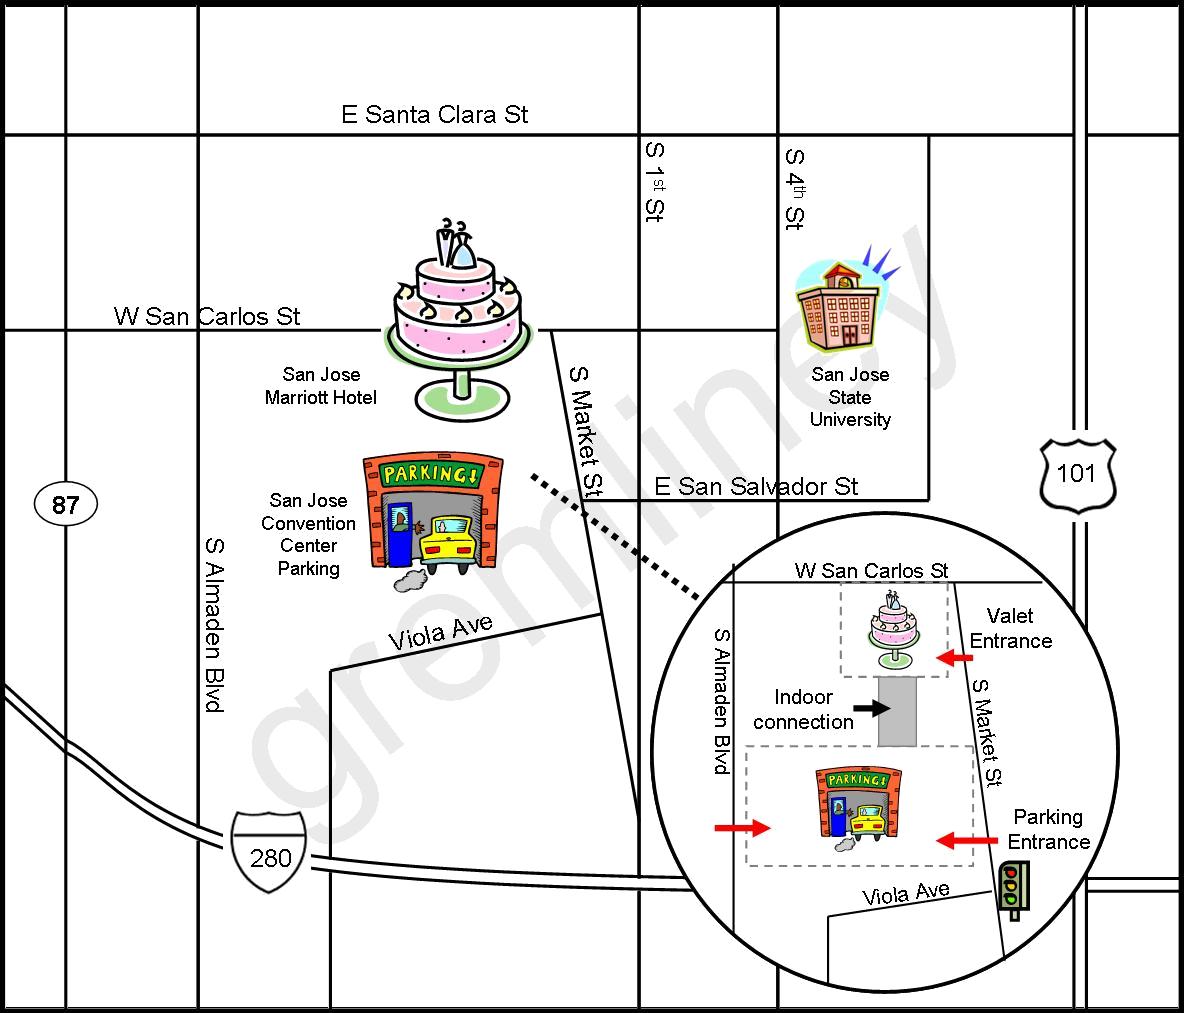
9. To make key event sites stand out, try to highlight them with interesting icons or clip arts. In case you’re wondering, PowerPoint actually does an adequate job on searching for suitable clip arts when provided with the right keyword (ie. birthday, wedding, party, parking, etc.)
If parking is separated from the event site, you may want to include it in the map too (Fig. 3)
10. To match the map to your party colors/theme, try formatting selected drawn objects on the slide. You can do so by right-clicking on the object and going to the Format menu.
11. Once you’re done detailing the map, remove the Google map backdrop. Group all drawings together (i.e. Select them all, right-click, Grouping –> Group) before saving the picture. Now you’re ready to insert a homemade map in your party invitation!
Don’t have the time to do it yourself?
While Cherish Paperie is designing your invitations, we’d be more than happy to design a custom map for you as well! And remember these important tips when creating your map.
Check out weddingmapper.com and have their software do it for you! Or create your map on mapfling.com and just publish the URL of your map on your invite for others to view on their own.










Pingback: Homepage